A lot of people have ventured into the world of cutting machines with very little understanding of what they are doing. It’s not their fault, the machine companies push the idea that all you have to do is to press a button. It’s simply not true.
I have a much easier time with vinyl than many people I see posting in Facebook groups. I think that’s because I started and worked with paper for many years. While working with paper, it was necessary to develop an understanding of blade depth and pressure (called thickness by Silhouette). By calling pressure “thickness” they confuse a lot of people, because thickness of the material you are cutting actually relates more to blade depth.
Hobby machines all come with click-type adjustable blades (if you have an old Silhouette or Wishblade, it came with colored caps to adjust the blade. With a click blade, the higher the number, the more the blade sticks out. You may have purchased a CB09 blade for the Silhouette. That’s a professional Graphtec blade and to use it you need to understand what the blade is supposed to do.
THE BLADE: Blade adjustment comes first, whether cutting vinyl or paper. The blade should be extending no further than very slightly more than the thickness of your material. Too far and it will cut the mat, not far enough and it won’t cut through. This is a lot less than you might think it is. Any other adjustments should be made with the pressure or the “thickness”. Most people have their blade out too far. It should be sticking out just less than the thickness of a credit card. Other adjustments are made in the pressure setting (thickness on the Silhouette)
Take a minute and watch this video: ADJUSTING THE BLADE FOR VINYL CUTTING
Cutting Paper: Lately, it seems a lot of people are trying to cut paper. Adjusting the blade to cut paper is much trickier. The settings recommended by your machine are for their brand of paper only, and of course, you want to use a variety of papers. Don’t we all? Again, you want the blade only slightly deeper than your paper – you don’t want it cutting way into your mat. Too deep, and you’ll ruin your mat and it may shred your paper. Too shallow, and it won’t cut through. To test your blade setting, try this:
Put your paper on a piece of cardboard. Run your blade across it using a slight amount of pressure. Did it cut through the paper and only slightly mar the cardboard? If so, it’s good. If not, dial up or down. To see what this would look like, check out this page from US Cutter.
PRESSURE, THICKNESS, DOWNWARD FORCE: This is how much force the machine puts on the blade when cutting. I don’t know why Silhouette calls it THICKNESS since that is not a good description. I originally thought it had to do with how thick the material is, but really, it doesn’t. The thickness of the material determines your blade depth. For this reason, I prefer the term PRESSURE.
This setting is how much downward force is applied to the blade as it is cutting. At its highest setting (33) the Silhouette studio has 210 grams of force. To round things off, each number on their thickness settings is about 6 grams of force. Interestingly, Provocraft has refused to release the cutting force of the Cricut, but since it can cut heavier material than the Silhouette, I would assume it is slightly more, maybe 300 grams. Most vinyl manufacturers recommend starting at 40 grams of pressure and adjusting form there. That would be 8 or 9 on the Silhouette Cameo.
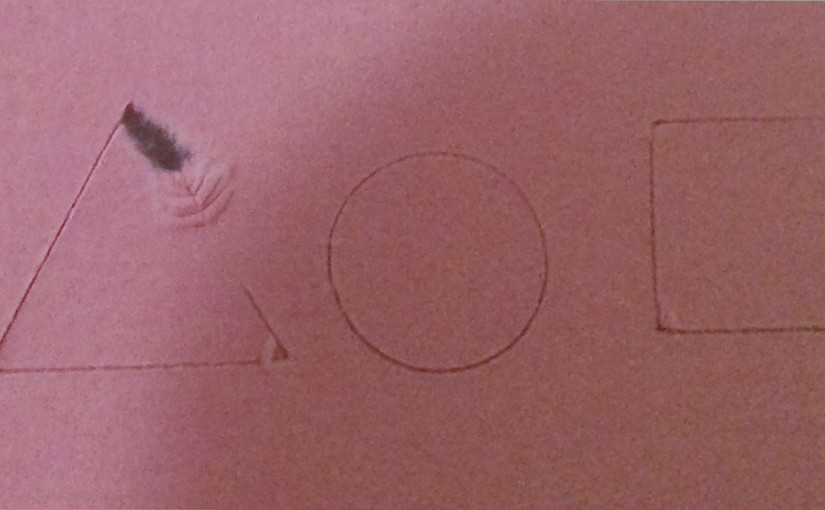
Cutting paper is much more difficult than cutting vinyl. There are so many kinds of paper with such different characteristics. Not all settings work for all paper. The thickness and density of the paper are important factors. You should do test cuts for paper and write your settings on a sample and file them away (if only I practiced what I preach). This picture is recollections cardstock at the standard settings. The circle is OK, the square has not quite crisp corners and the triangle is a major handing chad.

I then backed the blade off from 4 to 3 and it was a bit better, but the triangle and square still had to be pushed out and the corners weren’t crisp.
Here’s the secret: It’s the overcut function. I set mine to 0.2mm. What this does is cause the blade to lift and move forward 0.2mm at the corners. Voila! Crisp cuts that released cleanly.

